

Yes, laminate flooring can be repaired — but not the way wood can, and knowing the difference saves you from the two classic mistakes: sanding a floor that cannot be sanded, and ripping out a whole room over damage that one replacement plank would have solved.
Laminate repair follows its own logic. Small surface damage gets fixed in place with fillers and finesse. Anything deeper — swelling, delamination, a broken locking edge — means replacing the plank, because laminate’s photographic surface has no wood underneath to expose. The good news hiding in that limitation: click-lock construction makes plank replacement far more practical than most homeowners assume. We repair laminate floors across Lancaster County every week, and the majority of the “ruined” floors we’re called about leave the visit with a handful of new planks and years of life ahead. Here is how to tell which kind of problem you have, what you can fix yourself, and when to bring in help.
Why Laminate Repairs Differently Than Wood
A laminate plank is a stack of four layers fused under pressure: a clear melamine wear layer tough enough to shrug off most daily abuse, a photographic design layer that provides the wood look, a high-density fiberboard (HDF) core that gives the plank its body, and a backing layer that balances it. Everything you see is the photograph; everything structural is the core.
That construction explains the two rules that govern every laminate repair.
Rule one: laminate cannot be sanded or refinished. There is no wood grain beneath the surface to reveal — sanding through the wear layer simply erases the picture and leaves brown fiberboard staring back. Any repair either works on top of the wear layer or replaces the plank entirely.
Rule two: laminate damage is binary. Either the wear layer is intact and the problem is cosmetic, or moisture and force have reached the core and the plank itself is compromised. Cosmetic problems have in-place fixes. Core problems have exactly one fix, and it comes in a box of matching planks.
Run a simple test before deciding anything: press on the damaged spot. If it feels solid and the damage is purely visual — a chip, a scratch, a gouge that didn’t flex — you’re in cosmetic territory. If the plank feels spongy, the edges have raised, or the surface has bubbled, the core is involved and filler won’t save it.
Chips, Scratches, and Gouges: The Repairs You Can Make in Place
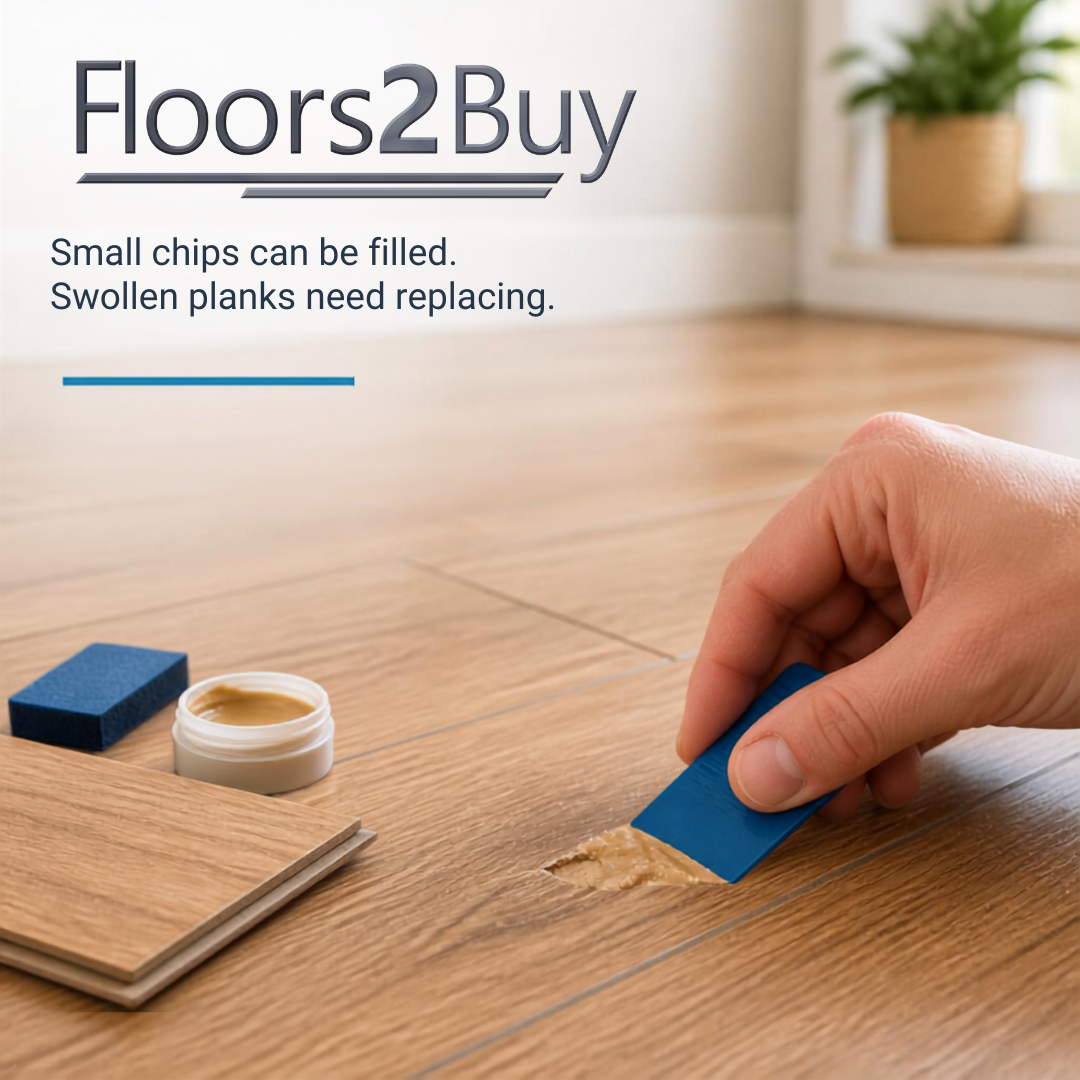
Small cosmetic damage is genuinely DIY-friendly, and the flooring aisle knows it: laminate repair kits — wax pencils, soft putty fillers, burn-in sticks, and touch-up markers — exist for exactly this work. Used well, they make a corner chip or a dropped-pan gouge disappear from conversational distance.
The honest technique matters more than the kit brand.
Clean the damaged spot and let it dry.
Match the color in daylight, not under warm lamps — and match it to the plank’s field color, not its darkest grain line, mixing two filler shades if needed, since wood-look designs are rarely one flat tone.
Overfill the chip slightly, let the filler set, then level it flush with a plastic scraper and wipe the residue before it hardens.
On textured planks, drag the scraper lightly along the grain direction so the patch doesn’t sit glossy-smooth inside a matte floor.
Know the technique’s ceiling. Fillers rescue chips up to roughly fingernail size, edge dings, and scratches deep enough to catch a fingernail. They cannot rebuild a crushed corner, restore a worn traffic lane where the photograph itself has rubbed away, or fix anything that flexes when pressed. And a cluster of many small repairs in one sightline eventually looks like what it is — at that point, one replaced plank beats twelve patches.
For hairline scratches that haven’t broken the wear layer, try the gentlest option first: a laminate-specific touch-up marker, or simply a thorough clean — plenty of “scratches” brought to us turn out to be scuffs and residue that a proper cleaner lifts entirely. Our guide to long-term laminate care covers the cleaning products that protect the wear layer instead of dulling it.
Three Internet Fixes That Make Laminate Worse
Repair advice travels fast online, and three popular tricks generate a steady share of our repair calls — as the cause, not the cure.
Gluing or nailing down a loose plank. A floating floor must float; that is the engineering, not a suggestion. Anchor one plank to the subfloor and it becomes a fixed point the rest of the floor grinds against through every seasonal cycle — the peaking and seam damage show up a season later, several feet from the glue. Loose planks have causes (subfloor dips, failed locking edges, missing expansion room), and every cause has a better fix than adhesive.
The iron-and-towel trick for dents. It circulates because it genuinely works on solid wood, where steam re-expands crushed fibers. On laminate, heat and steam attack the wear layer’s bond and swell the fiberboard beneath — you trade a dent for a bubble, which is not an upgrade.
Filling gaps with caulk or wood filler. Seasonal gaps are the floor breathing. Hard filler in a moving joint either crumbles out by spring or, worse, holds — and transfers the movement stress to the locking edges, which crack. Cover breathing room with trim; never plug it.
Lifting Edges, Peaking, and Gaps: When the Floor Starts Moving
Movement problems look alarming because the whole floor seems involved — planks tenting upward at a doorway, edges curling, gaps opening between boards in winter. The cause is almost never the plank you’re staring at. Laminate floats: the planks lock to each other, not to the subfloor, and the entire surface expands and contracts as one sheet with temperature and humidity. Movement problems are boundary problems.
Peaking — planks pressing upward into a ridge — means the floating floor has run out of room. Somewhere, the expansion gap that should ring the room’s perimeter is missing or blocked: baseboards nailed through the flooring, a transition strip screwed too tight, planks cut hard against a door frame. The fix is often wonderfully anticlimactic — relieve the pressure point, trim the perimeter plank edge under the baseboard, and the ridge settles over days or weeks. We’ve covered what happens when laminate is installed without proper expansion gaps in detail, because this single installation-day shortcut generates more repair calls than any other.
The opposite complaint arrives every January: an expansion gap too big, peeking out from under trim as planks contract in furnace-dry air. If the gap only shows in deep winter, humidity control is the real fix — laminate wants the same 35-to-55-percent range as the rest of your house. If the reveal is permanent, the answer is trim, not surgery: a slightly wider baseboard, quarter-round, or a properly sized transition molding covers the engineered breathing room the floor still needs. Never fill an expansion gap with caulk or filler; you’d be handcuffing a floor that must move.
Lifting or curling at plank edges is the one movement symptom that usually is the plank. Edges that swell upward have taken on moisture — and that conversation belongs in the next section.
Swollen, Bubbled, and Water-Damaged Planks: The One-Way Door
Here is the hard truth every laminate owner eventually meets: a swollen HDF core never shrinks back. Wood fibers compressed under heat and pressure at the factory expand when saturated, the compression is gone forever, and no amount of drying, weighting, or wishing restores the original dimensions. Raised seams, bubbled surfaces, and puffy edges are permanent residents once they appear.
That makes water-damaged laminate a two-step repair, and the order is everything.
Step one: find and stop the water. A one-time event — the overflowed pot, the pet accident discovered late — needs nothing more than cleanup. But swelling along a run of planks near a dishwasher, an exterior door, or a basement wall usually means a slow, repeating source, and replacing planks before solving it just schedules the same repair for next year.
Step two: replace the affected planks. Because laminate fails plank by plank, a contained event typically claims two to six boards, not a room.
Newer waterproof laminate lines have shifted this picture substantially — tighter cores and sealed seams that tolerate topside spills for many hours. They’re a real upgrade for kitchens and busy households, and worth a look in our laminate flooring in Lancaster selection when an aging floor’s third water incident starts making the replace-it-all math interesting.
How Plank Replacement Actually Works (and Why Matching Is the Hard Part)
Click-lock laminate offers two roads to a damaged plank. The unzip method: pull the baseboard on the nearest wall, lift the perimeter row, and disassemble plank by plank back to the casualty — then rebuild. It’s methodical, damage-free, and entirely practical when the target sits within a few rows of a wall. For a plank marooned mid-room, pros use the cut-out method instead: cut the damaged plank free, trim the replacement’s locking ridge, glue it into the opening, and weight it flat overnight. Done well, the transplant is invisible. Done with a wandering saw blade, it recruits its neighbors into the casualty list — this is the repair where experience pays for itself fastest.
The genuinely hard part isn’t the surgery; it’s the donor. Laminate designs retire quickly, and a decade-old floor’s exact pattern is often discontinued. Check your own reserves first: leftover boxes in the attic, basement, or garage are gold, which is why we tell every buyer to keep a spare box at professional installation time. No leftovers? Bring us a photo and, ideally, a plank — matching materials to existing floors is part of the professional flooring repair work we do across Lancaster, York, and the surrounding counties, and when an exact match no longer exists, there are honorable workarounds: harvesting hidden planks from inside a closet on the same floor, or choosing a deliberate contrast at a doorway transition rather than a near-miss in the middle of the room.
One symptom often mistaken for damage: the hollow, clicky sound underfoot in certain spots. That’s rarely a broken plank — it’s the underlayment story beneath the floor, and we’ve unpacked hollow sounds in laminate flooring separately. Worth reading before assuming the worst.
What a Professional Laminate Repair Visit Actually Looks Like
Homeowners sometimes wait months to call about a damaged floor because they assume the visit ends in a replacement quote. The actual sequence is less dramatic. First comes diagnosis: pressing for soft spots, reading the swelling pattern to trace where water entered, checking the perimeter for blocked expansion gaps, and — over concrete or above a basement — taking a moisture reading, because a floor repaired without finding its moisture source is a floor rebooked for next year.
Then comes the matching work: identifying the product from a spare plank, a photo of the pattern repeat, or the milling profile, and sourcing replacements — the part of the job where a dealer’s supplier relationships quietly do the heavy lifting. The repair itself is often the shortest chapter: a morning’s work for a typical plank swap or perimeter adjustment. Targeted fixes like these are the point of the service — restoring the floor you have for a fraction of replacing it, which is exactly how we approach repair work across the Lancaster area. The floors that do get replacement recommendations are the ones where honesty demands it, and you’ll hear the reasoning, not just the number.
Repair or Replace the Whole Floor? A Lancaster County Reality Check
The math we walk homeowners through at the counter comes down to four questions.
How much of the floor is affected? A useful rule: damage touching under ten percent of the planks, in a floor you otherwise like, almost always favors repair. Damage across whole traffic lanes — worn photograph, widespread edge swell — means the floor is telling you its age.
Can the material be matched? With spare boxes or a current pattern, repair is straightforward. With a long-discontinued design and no donors, every repair will show, and the calculus shifts.
How old is the floor, and how thick was it to begin with? Budget-grade laminate from fifteen years ago was often thin, hollow-sounding, and modest in its wear rating; today’s mid-range product is thicker, quieter, and frequently waterproof. If your floor predates those improvements, a repair buys time but not satisfaction — our breakdown of the best thickness for laminate flooring shows what changed and why it matters underfoot.
What is the water history? A floor on its third moisture event has a location problem, not a plank problem. That’s the moment to consider whether the room wants laminate at all — waterproof luxury vinyl owns truly wet rooms, and engineered hardwood upgrades the rooms where you wanted real wood all along. When replacement is the honest answer, flooring financing spreads the cost, and warehouse pricing keeps the number smaller than most homeowners brace for.
Local context tilts the math too. Lancaster County’s seasonal humidity swing — muggy summers, furnace-dry winters — is exactly the cycle that finds every skipped expansion gap and every unsealed seam in a laminate floor. Floors here age by how well their installation respected that swing, which is why two identical products in two township homes can look a decade apart in age. It’s also why our repair visits so often end in an adjustment and a humidifier recommendation rather than a sales pitch — the plank was never the problem.
Keeping the Next Repair Off Your Calendar
Almost everything above is preventable, and none of the prevention is expensive.
Felt pads under furniture, and fresh ones twice a year.
Mats at exterior doors to catch the grit that grinds down wear layers.
Spills wiped when they happen, and never a steam mop — steam forces moisture into the seams where swelling starts, and it voids most laminate warranties on its way in.
Humidity held steady through the seasons.
And when you buy your next floor, two decisions at the register quietly pre-solve future repairs: buy one extra box for the attic, and choose a wear rating that matches your household’s actual chaos level. The complete routine lives in our laminate flooring guide, and all of it together takes maybe 10 minutes a week.
Laminate Repair: Quick Answers
Can laminate flooring be repaired without replacing planks?
Cosmetic damage, yes: chips, small gouges, and scratches fill invisibly with color-matched laminate repair kits. Structural damage - swelling, bubbling, broken locking edges - cannot be fixed in place; those planks get replaced individually.
Can you replace just one plank of laminate flooring?
Yes. Near a wall, the planks can be unclicked back to the damaged one and reassembled. Mid-room, a professional cuts out the damaged plank and glues in a trimmed replacement. The harder problem is usually finding a matching plank - keep a spare box from every installation.
Can laminate floors be sanded and refinished?
No, never. The surface is a photograph under a melamine wear layer, with fiberboard underneath - sanding erases the image permanently. Any laminate that looks refinished was actually replaced.
Why is my laminate floor lifting at the edges?
Edge lifting or curling means moisture has reached the core, which swells permanently. Peaking - a raised ridge across the floor - is different: the floating floor has run out of expansion room, and relieving the perimeter pressure usually settles it.
Can water-damaged laminate flooring be fixed?
The swollen planks themselves cannot be restored - a saturated core never returns to size. The repair is finding and stopping the water source, then replacing the affected boards. Contained events typically claim a handful of planks, not the room.
My laminate expansion gap looks too big - is that a problem?
Usually not. If it appears in winter and closes in summer, that is normal seasonal contraction; steadier indoor humidity shrinks the swing. A permanently visible gap is covered with wider trim or quarter-round - never filled or caulked, because the floor still needs room to move.
Do laminate floor repair kits actually work?
For their intended job, yes: chips, small gouges, and edge dings up to roughly fingernail size disappear under color-matched filler applied patiently. They cannot fix swelling, worn-through surfaces, or anything that flexes underfoot - and a dozen patches in one sightline look worse than one replaced plank.
When is it better to replace a laminate floor than repair it?
When damage spans more than about ten percent of the planks, the pattern is discontinued with no spares, the wear layer is worn through in traffic lanes, or the room keeps producing water events. At that point, newer waterproof laminate or luxury vinyl solves the underlying problem instead of patching its symptoms.
Where This Leaves Your Floor
Sort the damage honestly and laminate is a very fixable floor: fillers for the chips, boundary adjustments for the movement, plank swaps for the swelling, and a straight answer for the floors whose time has genuinely come. The skill is in the diagnosis — pressing the spot, reading the season, finding the water — and diagnosis is the part that costs you nothing to get help with.
If your floor has a chip you can live with, a kit and a careful hand will serve you well. If it has a ridge, a soft spot, or a stretch of swollen seams, have someone who repairs these floors weekly take a look before you price a full replacement — what our customers say about those visits is that the honest answer came first. Either way, when you want real numbers for your actual room, request a free estimate: we’ll assess what’s fixable, match what’s replaceable, and if the floor truly is done, quote its successor in writing, without piling a hard sell on top of a bad week. Most laminate floors have more life left than their worst plank suggests. Start with the diagnosis.


